Esta página fue traducida por PageTurner AI (beta). No está respaldada oficialmente por el proyecto. ¿Encontraste un error? Reportar problema →
Invocación de funciones nativas en tu componente nativo
En la guía base para crear un nuevo componente nativo, exploraste cómo crear un componente, pasar propiedades del lado JS al nativo y emitir eventos del lado nativo a JS.
Los componentes personalizados también pueden llamar funciones implementadas en el código nativo de forma imperativa, para lograr funcionalidades más avanzadas como recargar una página web programáticamente.
En esta guía aprenderás cómo lograrlo usando un nuevo concepto: Comandos Nativos.
Esta guía parte de la guía de Componentes Nativos y asume que estás familiarizado con ella y con Codegen.
1. Actualizar las especificaciones del componente
El primer paso es actualizar las especificaciones del componente para declarar el NativeCommand.
- TypeScript
- Flow
Update the WebViewNativeComponent.ts as it follows:
import type {HostComponent, ViewProps} from 'react-native';
import type {BubblingEventHandler} from 'react-native/Libraries/Types/CodegenTypes';
import codegenNativeComponent from 'react-native/Libraries/Utilities/codegenNativeComponent';
+import codegenNativeCommands from 'react-native/Libraries/Utilities/codegenNativeCommands';

type WebViewScriptLoadedEvent = {
  result: 'success' | 'error';
};

export interface NativeProps extends ViewProps {
  sourceURL?: string;
  onScriptLoaded?: BubblingEventHandler<WebViewScriptLoadedEvent> | null;
}

+interface NativeCommands {
+    reload: (viewRef: React.ElementRef<HostComponent<NativeProps>>) => void;
+}

+export const Commands: NativeCommands = codegenNativeCommands<NativeCommands>({
+    supportedCommands: ['reload'],
+});

export default codegenNativeComponent<NativeProps>(
  'CustomWebView',
) as HostComponent<NativeProps>;
Update the WebViewNativeComponent.js as it follows:
// @flow strict-local

import type {HostComponent, ViewProps} from 'react-native';
import type {BubblingEventHandler} from 'react-native/Libraries/Types/CodegenTypes';
import codegenNativeComponent from 'react-native/Libraries/Utilities/codegenNativeComponent';
+import codegenNativeCommands from 'react-native/Libraries/Utilities/codegenNativeCommands';

type WebViewScriptLoadedEvent = $ReadOnly<{|
  result: "success" | "error",
|}>;

type NativeProps = $ReadOnly<{|
  ...ViewProps,
  sourceURL?: string;
  onScriptLoaded?: BubblingEventHandler<WebViewScriptLoadedEvent>?;
|}>;

+interface NativeCommands {
+    reload: (viewRef: React.ElementRef<HostComponent<NativeProps>>) => void;
+}

+export const Commands: NativeCommands = codegenNativeCommands<NativeCommands>({
+    supportedCommands: ['reload'],
+});

export default (codegenNativeComponent<NativeProps>(
  'CustomWebView',
): HostComponent<NativeProps>);
Estos cambios requieren que:
-
Importes la función
codegenNativeCommandsdereact-native. Esto indica a Codegen que debe generar el código paraNativeCommands. -
Definas una interfaz que contenga los métodos que queremos invocar en nativo. Todos los Comandos Nativos deben tener un primer parámetro de tipo
React.ElementRef. -
Exportes la variable
Commands, que es el resultado de invocarcodegenNativeCommands, pasando una lista de los comandos soportados.
En TypeScript, React.ElementRef está obsoleto. El tipo correcto es React.ComponentRef. Sin embargo, debido a un error en Codegen, usar ComponentRef hará que la aplicación falle. Ya tenemos la solución, pero necesitamos lanzar una nueva versión de React Native para aplicarla.
2. Actualizar el código de la aplicación para usar el nuevo comando
Ahora puedes usar el comando en la aplicación.
- TypeScript
- Flow
Open the App.tsx file and modify it as it follows:
import React from 'react';
-import {Alert, StyleSheet, View} from 'react-native';
-import WebView from '../specs/WebViewNativeComponent';
+import {Alert, StyleSheet, Pressable, Text, View} from 'react-native';
+import WebView, {Commands} from '../specs/WebViewNativeComponent';

function App(): React.JSX.Element {
+    const webViewRef = React.useRef<React.ElementRef<typeof View> | null>(null);
+
+    const refresh = () => {
+        if (webViewRef.current) {
+            Commands.reload(webViewRef.current);
+        }
+    };

  return (
    <View style={styles.container}>
      <WebView
+       ref={webViewRef}
        sourceURL="https://react.dev/"
        style={styles.webview}
        onScriptLoaded={() => {
          Alert.alert('Page Loaded');
        }}
      />
+      <View style={styles.tabbar}>
+        <Pressable onPress={refresh} style={styles.button}>
+            {({pressed}) => (
+                !pressed ? <Text style={styles.buttonText}>Refresh</Text> : <Text style={styles.buttonTextPressed}>Refresh</Text>) }
+        </Pressable>
+      </View>
    </View>
  );
}

const styles = StyleSheet.create({
  container: {
    flex: 1,
    alignItems: 'center',
    alignContent: 'center',
  },
  webview: {
    width: '100%',
-    height: '100%',
+    height: '90%',
  },
+  tabbar: {
+    flex: 1,
+    backgroundColor: 'gray',
+    width: '100%',
+    alignItems: 'center',
+    alignContent: 'center',
+  },
+  button: {
+    margin: 10,
+  },
+  buttonText: {
+    fontSize: 20,
+    fontWeight: 'bold',
+    color: '#00D6FF',
+    width: '100%',
+  },
+  buttonTextPressed: {
+    fontSize: 20,
+    fontWeight: 'bold',
+    color: '#00D6FF77',
+    width: '100%',
+  },
});

export default App;
Los cambios relevantes son:
-
Importa la constante
Commandsdel archivo de especificaciones. El comando es un objeto que nos permite llamar a los métodos que tenemos en nativo. -
Declara una referencia al componente nativo personalizado
WebViewusandouseRef. Necesitas pasar esta referencia al comando nativo. -
Implementa la función
refresh. Esta función verifica que la referencia a WebView no sea nula y, si no lo es, llama al comando. -
Agrega un componente Pressable para llamar al comando cuando el usuario presione el botón.
Los cambios restantes son ajustes habituales de React para añadir el Pressable y estilizar la vista para que luzca mejor.
3. Volver a ejecutar Codegen
Ahora que las especificaciones están actualizadas y el código está listo para usar el comando, es momento de implementar el código nativo. Sin embargo, antes de escribir código nativo, debes volver a ejecutar Codegen para que genere los nuevos tipos necesarios.
- Android
- iOS
Codegen is executed through the generateCodegenArtifactsFromSchema Gradle task:
cd android
./gradlew generateCodegenArtifactsFromSchema

BUILD SUCCESSFUL in 837ms
14 actionable tasks: 3 executed, 11 up-to-date
This is automatically run when you build your Android application.
Codegen is run as part of the script phases that's automatically added to the project generated by CocoaPods.
cd ios
bundle install
bundle exec pod install
The output will look like this:
...
Framework build type is static library
[Codegen] Adding script_phases to ReactCodegen.
[Codegen] Generating ./build/generated/ios/ReactCodegen.podspec.json
[Codegen] Analyzing /Users/me/src/TurboModuleExample/package.json
[Codegen] Searching for codegen-enabled libraries in the app.
[Codegen] Found TurboModuleExample
[Codegen] Searching for codegen-enabled libraries in the project dependencies.
[Codegen] Found react-native
...
4. Implementar el código nativo
Ahora es momento de implementar los cambios nativos que permitirán que tu JS invoque métodos directamente en tu vista nativa.
- Android
- iOS
To let your view respond to the Native Command, you only have to modify the ReactWebViewManager.
If you try to build right now, the build will fail, because the current ReactWebViewManager does not implement the new reload method.
To fix the build error, let's modify the ReactWebViewManager to implement it.
- Java
- Kotlin
//...
  @ReactProp(name = "sourceUrl")
  @Override
  public void setSourceURL(ReactWebView view, String sourceURL) {
    if (sourceURL == null) {
      view.emitOnScriptLoaded(ReactWebView.OnScriptLoadedEventResult.error);
      return;
    }
    view.loadUrl(sourceURL, new HashMap<>());
  }

+  @Override
+  public void reload(ReactWebView view) {
+    view.reload();
+  }

  public static final String REACT_CLASS = "CustomWebView";
//...
  @ReactProp(name = "sourceUrl")
  override fun setSourceURL(view: ReactWebView, sourceURL: String?) {
    if (sourceURL == null) {
      view.emitOnScriptLoaded(ReactWebView.OnScriptLoadedEventResult.error)
      return;
    }
    view.loadUrl(sourceURL, emptyMap())
  }

+  override fun reload(view: ReactWebView) {
+    view.reload()
+  }

  companion object {
    const val REACT_CLASS = "CustomWebView"
  }
In this case, it's enough to call directly the view.reload() method because our ReactWebView inherits from the Android's WebView and it has a reload method directly available. If you are implementing a custom function, that is not available in your custom view, you might also have to implement the required method in the Android's View that is managed by the React Native's ViewManager.
To let your view respond to the Native Command, we need to implement a couple of methods on iOS.
Let's open the RCTWebView.mm file and let's modify it as it follows:
  // Event emitter convenience method
  - (const CustomWebViewEventEmitter &)eventEmitter
  {
  return static_cast<const CustomWebViewEventEmitter &>(*_eventEmitter);
  }

+  - (void)handleCommand:(const NSString *)commandName args:(const NSArray *)args
+  {
+  RCTCustomWebViewHandleCommand(self, commandName, args);
+  }
+
+  - (void)reload
+  {
+  [_webView reloadFromOrigin];
+  }

  + (ComponentDescriptorProvider)componentDescriptorProvider
  {
  return concreteComponentDescriptorProvider<CustomWebViewComponentDescriptor>();
  }
To make your view respond to the Native Commands, you need to apply the following changes:
- Add a
handleCommand:argsfunction. This function is invoked by the components infrastructure to handle the commands. The function implementation is similar for every component: you need to call anRCT<componentNameInJS>HandleCommandfunction that is generated by Codegen for you. TheRCT<componentNameInJS>HandleCommandperform a bunch of validation, verifying that the command that we need to invoke is among the supported ones and that the parameters passed matches the one expected. If all the checks pass, theRCT<componentNameInJS>HandleCommandwill then invoke the proper native method. - Implement the
reloadmethod. In this example, thereloadmethod calls thereloadFromOriginfunction of the WebKit's WebView.
5. Ejecutar tu aplicación
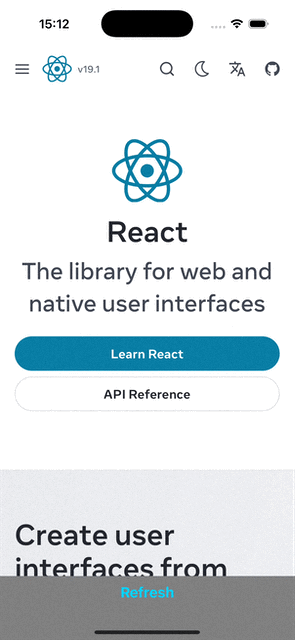
Finalmente, puedes ejecutar tu aplicación con los comandos habituales. Una vez que la aplicación esté en funcionamiento, puedes presionar el botón de recarga para ver cómo se vuelve a cargar la página.
 |  |